After trying to turn my C64 into a USB keyboard the whole project ended in a cupboard for a year at 90% completion. In the end the whole PICAXE – Arduino Pro Micro combination felt a bit clumsy.
Then I recently stumbled on a blogpost where someone connects a ZX81 keyboard to the Arduino Leonardo, and I found a cheap (€12,-) Leonardo-clone so I decided this was the way to go.

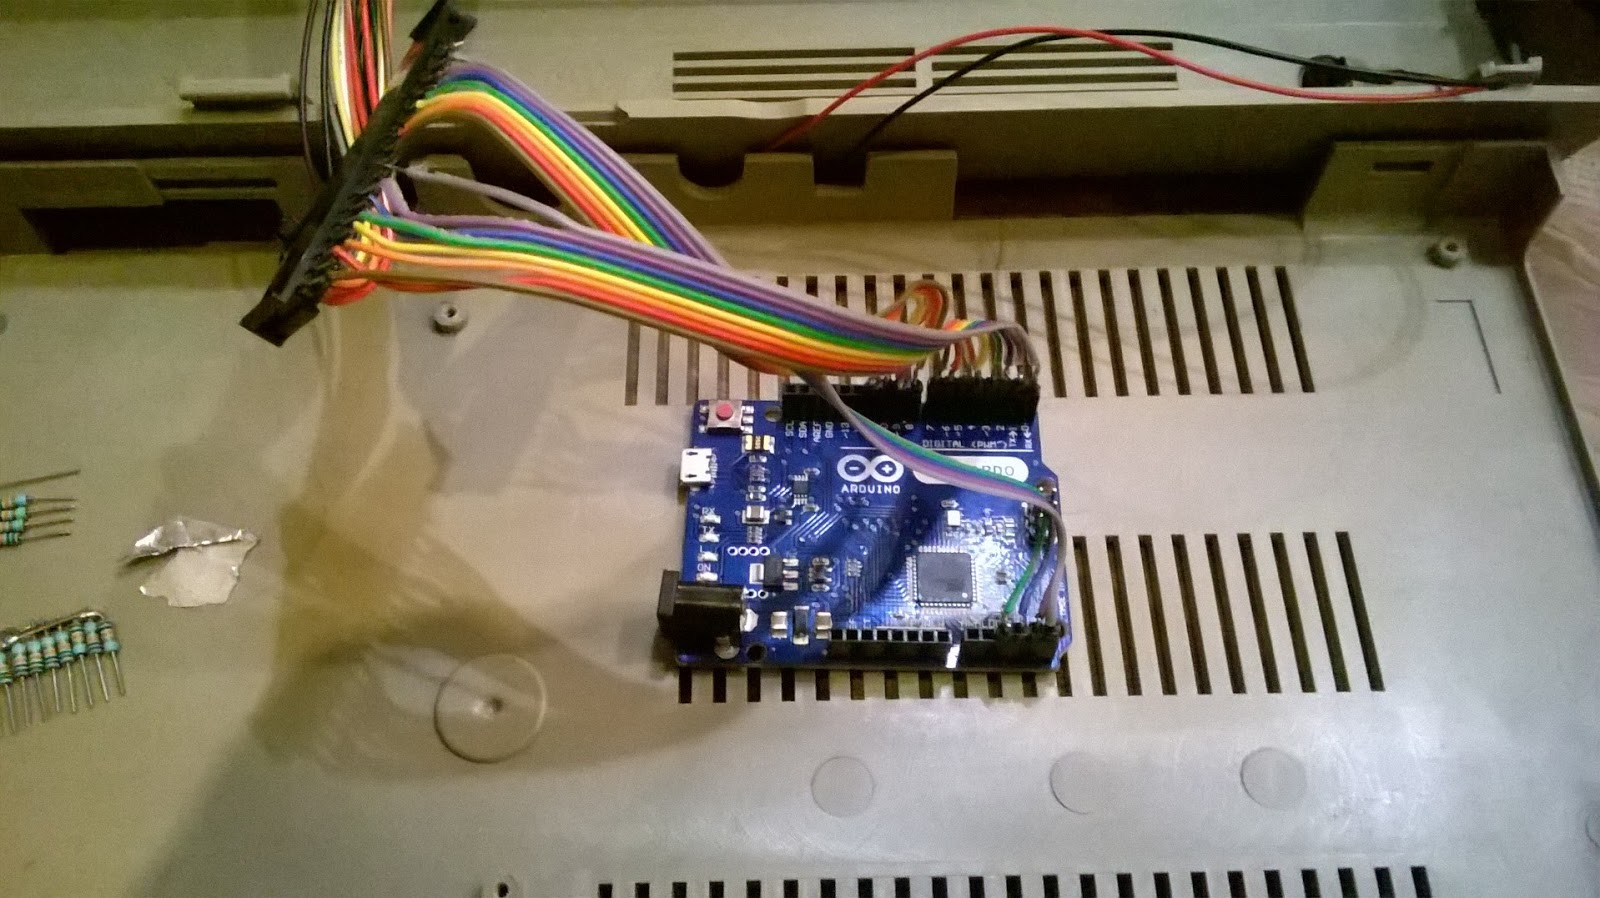
The board came with front headers, which makes connecting the keyboard super easy.
This is the C64 Keyboard matrix: ( diagram from the ‘WaitingForFriday‘ blog)

It is connected to the Arduino as follows:
A – D0
B – D1
C – D2
D – D3
E – D4
F – D5
G – D6
H – D7
0 – D8
1 – D9
2 – D10
3 – D11
4 – A0
5 – A1
6 – A2
7 – A3
The code can be a mix of the code from ‘Biosrythm‘ and TechTonic . :
#include <Keyboard.h>

// ZX81 USB Keyboard for Leonardo
// (c) Dave Curran
// 2013-04-27

// Modified with Function keys by Tony Smith
// 2014-02-15
// Adapted for use with Commodore 64 Keyboard by Cees Meijer
// 2015-11-04
// Enable the debug mode (serial output) by keeping F7 pressed when
// starting the program
// Special Commodore graphic characters are not implemented

#define NUM_ROWS 8
#define NUM_COLS 8

#define SHIFT_ROW 3
#define SHIFT_COL 1

#define RSHIFT_ROW 4
#define RSHIFT_COL 6

#define F7_ROW 7
#define F7_COL 7

#define DEBOUNCE_VALUE 100
#define REPEAT_DELAY 500

// Keymap for normal use

byte keyMap[NUM_ROWS][NUM_COLS] =
{
  {'1', '3', '5', '7', '9', '+', '$', KEY_BACKSPACE},
  {KEY_LEFT_ARROW, 'w', 'r', 'y', 'i', 'p', '*', KEY_RETURN},
  {'~', 'a', 'd', 'g', 'j', 'l', ';', KEY_LEFT_ARROW},
  {'~', 0  , 'x', 'v', 'n', ',', '/', KEY_UP_ARROW},
  {' ', 'z', 'c', 'b', 'm', '.', 0  , KEY_F1},
  {'~', 's', 'f', 'h', 'k',':', '=' , KEY_F3},
  {'q', 'e', 't', 'u', 'o', '@', KEY_UP_ARROW, KEY_F5},
  {'2', '4', '6', '8', '0', '-', '~', KEY_F7}
};

// Keymap if Shift is pressed

byte keyMapShifted[NUM_ROWS][NUM_COLS] =
{
  {'!', '#', '%', '\'', ')', '+', '$', KEY_BACKSPACE},
  {KEY_LEFT_ARROW, 'W', 'R', 'Y', 'I', 'P', '*', KEY_RETURN},
  {'~', 'A', 'D', 'G', 'J', 'L', ']', KEY_RIGHT_ARROW},
  {'~', 0  , 'X', 'V', 'N', '<', '?', KEY_DOWN_ARROW},
  {' ', 'Z', 'C', 'B', 'M', '>', 0  ,KEY_F2},
  {'~', 'S', 'F', 'H', 'K','[', '=', KEY_F4},
  {'Q', 'E', 'T', 'U', 'O', '@', KEY_UP_ARROW, KEY_F6},
  {'"', '$', '&', '(', '0', '-', '~', KEY_F8}
};
// Global Variables

int debounceCount[NUM_ROWS][NUM_COLS];
int altKeyFlag;
bool serial_output;

// Define the row and column pins

byte colPins[NUM_COLS] = {0,1,2 ,3 ,4 ,5 ,6 ,7}; // A,B,C,D,E,F,G,H
byte rowPins[NUM_ROWS] = {8,9,10,11,A0,A1,A2,A3};

// SETUP

void setup()
{
  // Set all pins as inputs and activate pull-ups
  serial_output = false;
  for (byte c = 0 ; c < NUM_COLS ; c++)
  {
    pinMode(colPins[c], INPUT);
    digitalWrite(colPins[c], HIGH);

    // Clear debounce counts

    for (byte r = 0 ; r < NUM_ROWS ; r++)
    {
      debounceCount[r][c] = 0;
    }
  }

  // Set all pins as inputs

  for (byte r = 0 ; r < NUM_ROWS ; r++)
  {
    pinMode(rowPins[r], INPUT);
  }

  // Function key is NOT pressed

  altKeyFlag = ALT_KEY_OFF;
  pinMode(rowPins[F7_ROW], OUTPUT);
  if (digitalRead(colPins[F7_COL]) == LOW) serial_output = true;
  // Initialise the keyboard
  if (serial_output )
   {
    Serial.begin(9600);
   }
   else
   {
    Keyboard.begin();
   }
}

// LOOP

void loop()
{
  bool shifted = false;
  bool r_shifted = false;
  bool keyPressed = false;

  // Check for the Shift key being pressed

  pinMode(rowPins[SHIFT_ROW], OUTPUT);
  if (digitalRead(colPins[SHIFT_COL]) == LOW) shifted = true;

  pinMode(rowPins[RSHIFT_ROW], OUTPUT);
  if (digitalRead(colPins[RSHIFT_COL]) == LOW) shifted = true;

    pinMode(rowPins[SHIFT_ROW], INPUT);
    pinMode(rowPins[RSHIFT_ROW], INPUT);

    for (byte r = 0 ; r < NUM_ROWS ; r++)
    {
      // Run through the rows, turn them on

      pinMode(rowPins[r], OUTPUT);
      digitalWrite(rowPins[r], LOW);

      for (byte c = 0 ; c < NUM_COLS ; c++)
      {
        if (digitalRead(colPins[c]) == LOW)
        {
          // Increase the debounce count

          debounceCount[r][c]++;

          // Has the switch been pressed continually for long enough?

          int count = debounceCount[r][c];
          if (count == DEBOUNCE_VALUE)
          {
            // First press

            keyPressed = true;
            pressKey(r, c, shifted);
          }
          else if (count > DEBOUNCE_VALUE)
          {
            // Check for repeats

            count -= DEBOUNCE_VALUE;
            if (count % REPEAT_DELAY == 0)
            {
              // Send repeat

              keyPressed = true;
              pressKey(r, c, shifted);
            }
          }
        }
        else
        {
          // Not pressed; reset debounce count

          debounceCount[r][c] = 0;
        }
      }

    // Turn the row back off

    pinMode(rowPins[r], INPUT);
    }
    digitalWrite(rowPins[RSHIFT_ROW], LOW);
    digitalWrite(rowPins[SHIFT_ROW], LOW);

}

void pressKey(byte r, byte c, bool shifted)
{
  // Send the keypress
  if (serial_output)
{
Serial.print("|");Serial.print("\r\n");Serial.print("|");
Serial.print(r);Serial.print(",");Serial.print(c);Serial.print(":");
    }
  byte key = shifted ? keyMapShifted[r][c] : keyMap[r][c];

  if (serial_output)
   {
   if (key > 0){ Serial.write(key);}
   }
   else
   {
   if (key > 0 ) Keyboard.write(key);
   }

}

I found this page while searching for info for my project. I'm working on something similar where I'm using a keyboard from an HP Jornada 680 hooked up to a teensy++ 2.0.
The keyboard has a matrix with 9 rows and 14 columns. I've mapped the buttons out and i have all the pin combinations i need.
I think i can use your code as a start to get mine working. I also have an analog joystick and 2 pushbuttons connected for use as a mouse which is already working.
So hopefully with a little of your code and a little of the other code I'm using i can end up with something that works for both keyboard and mouse.
Thanks for the info I will study it and use what i can.